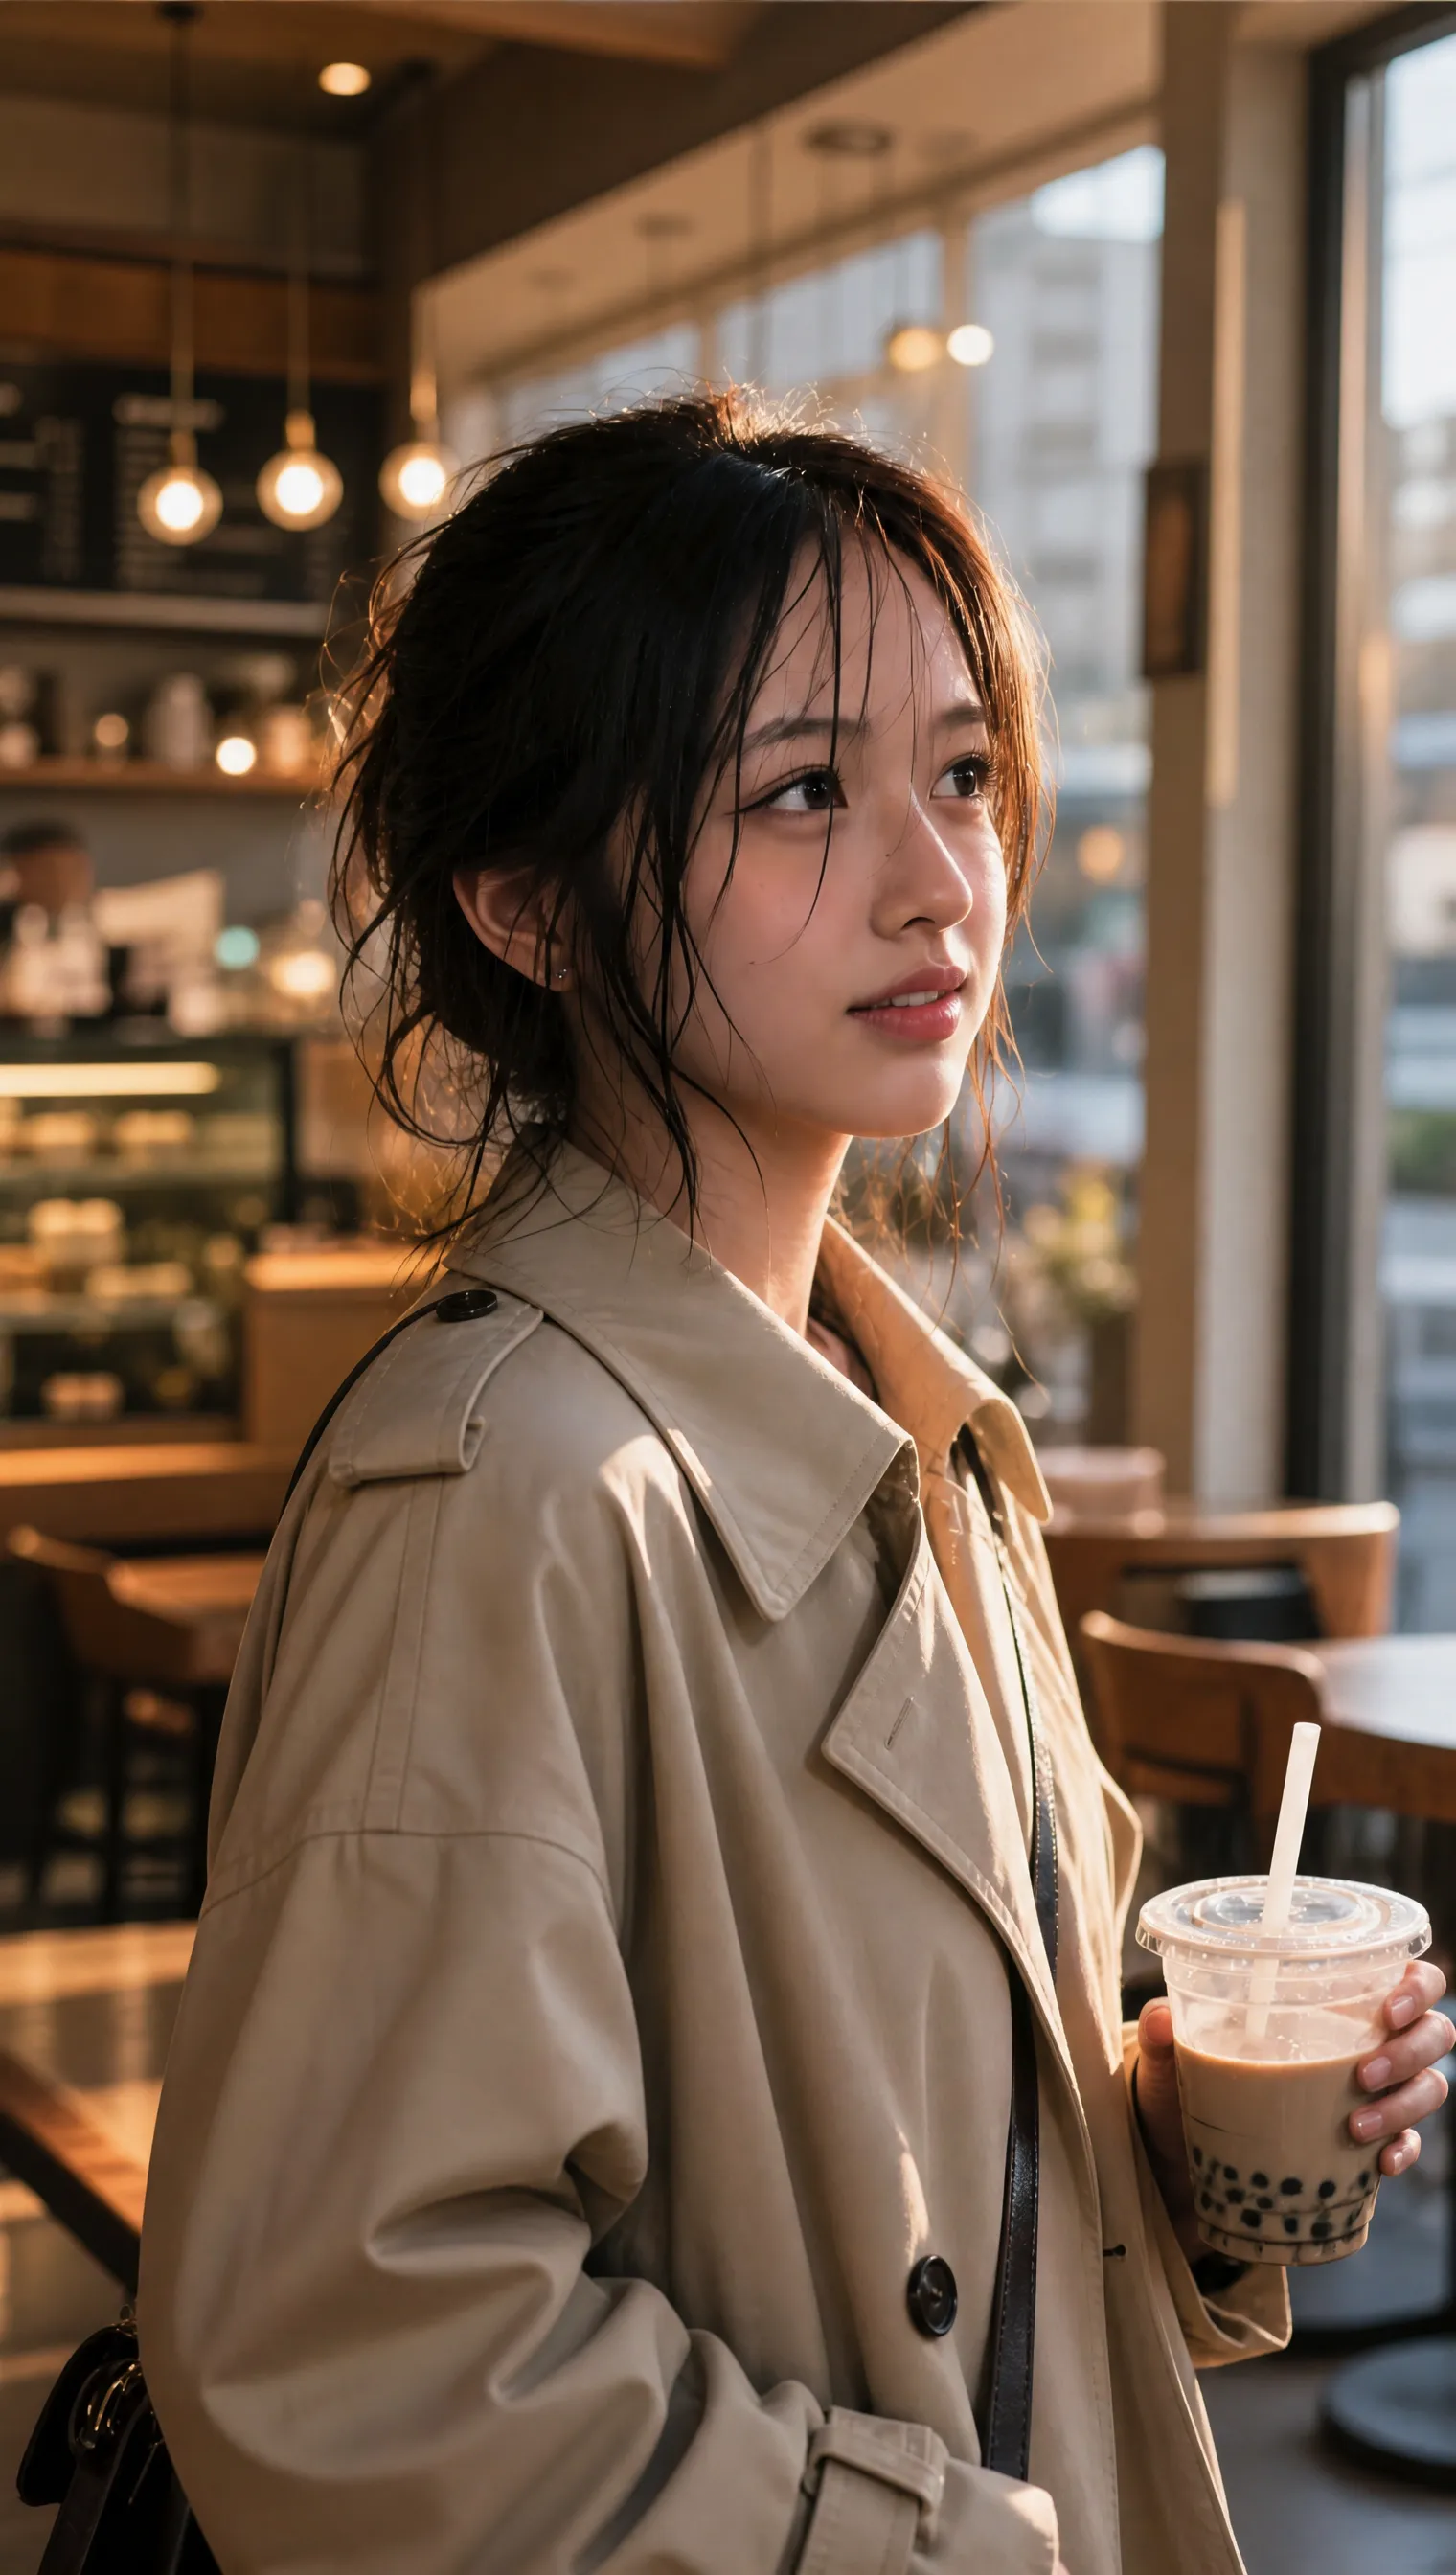
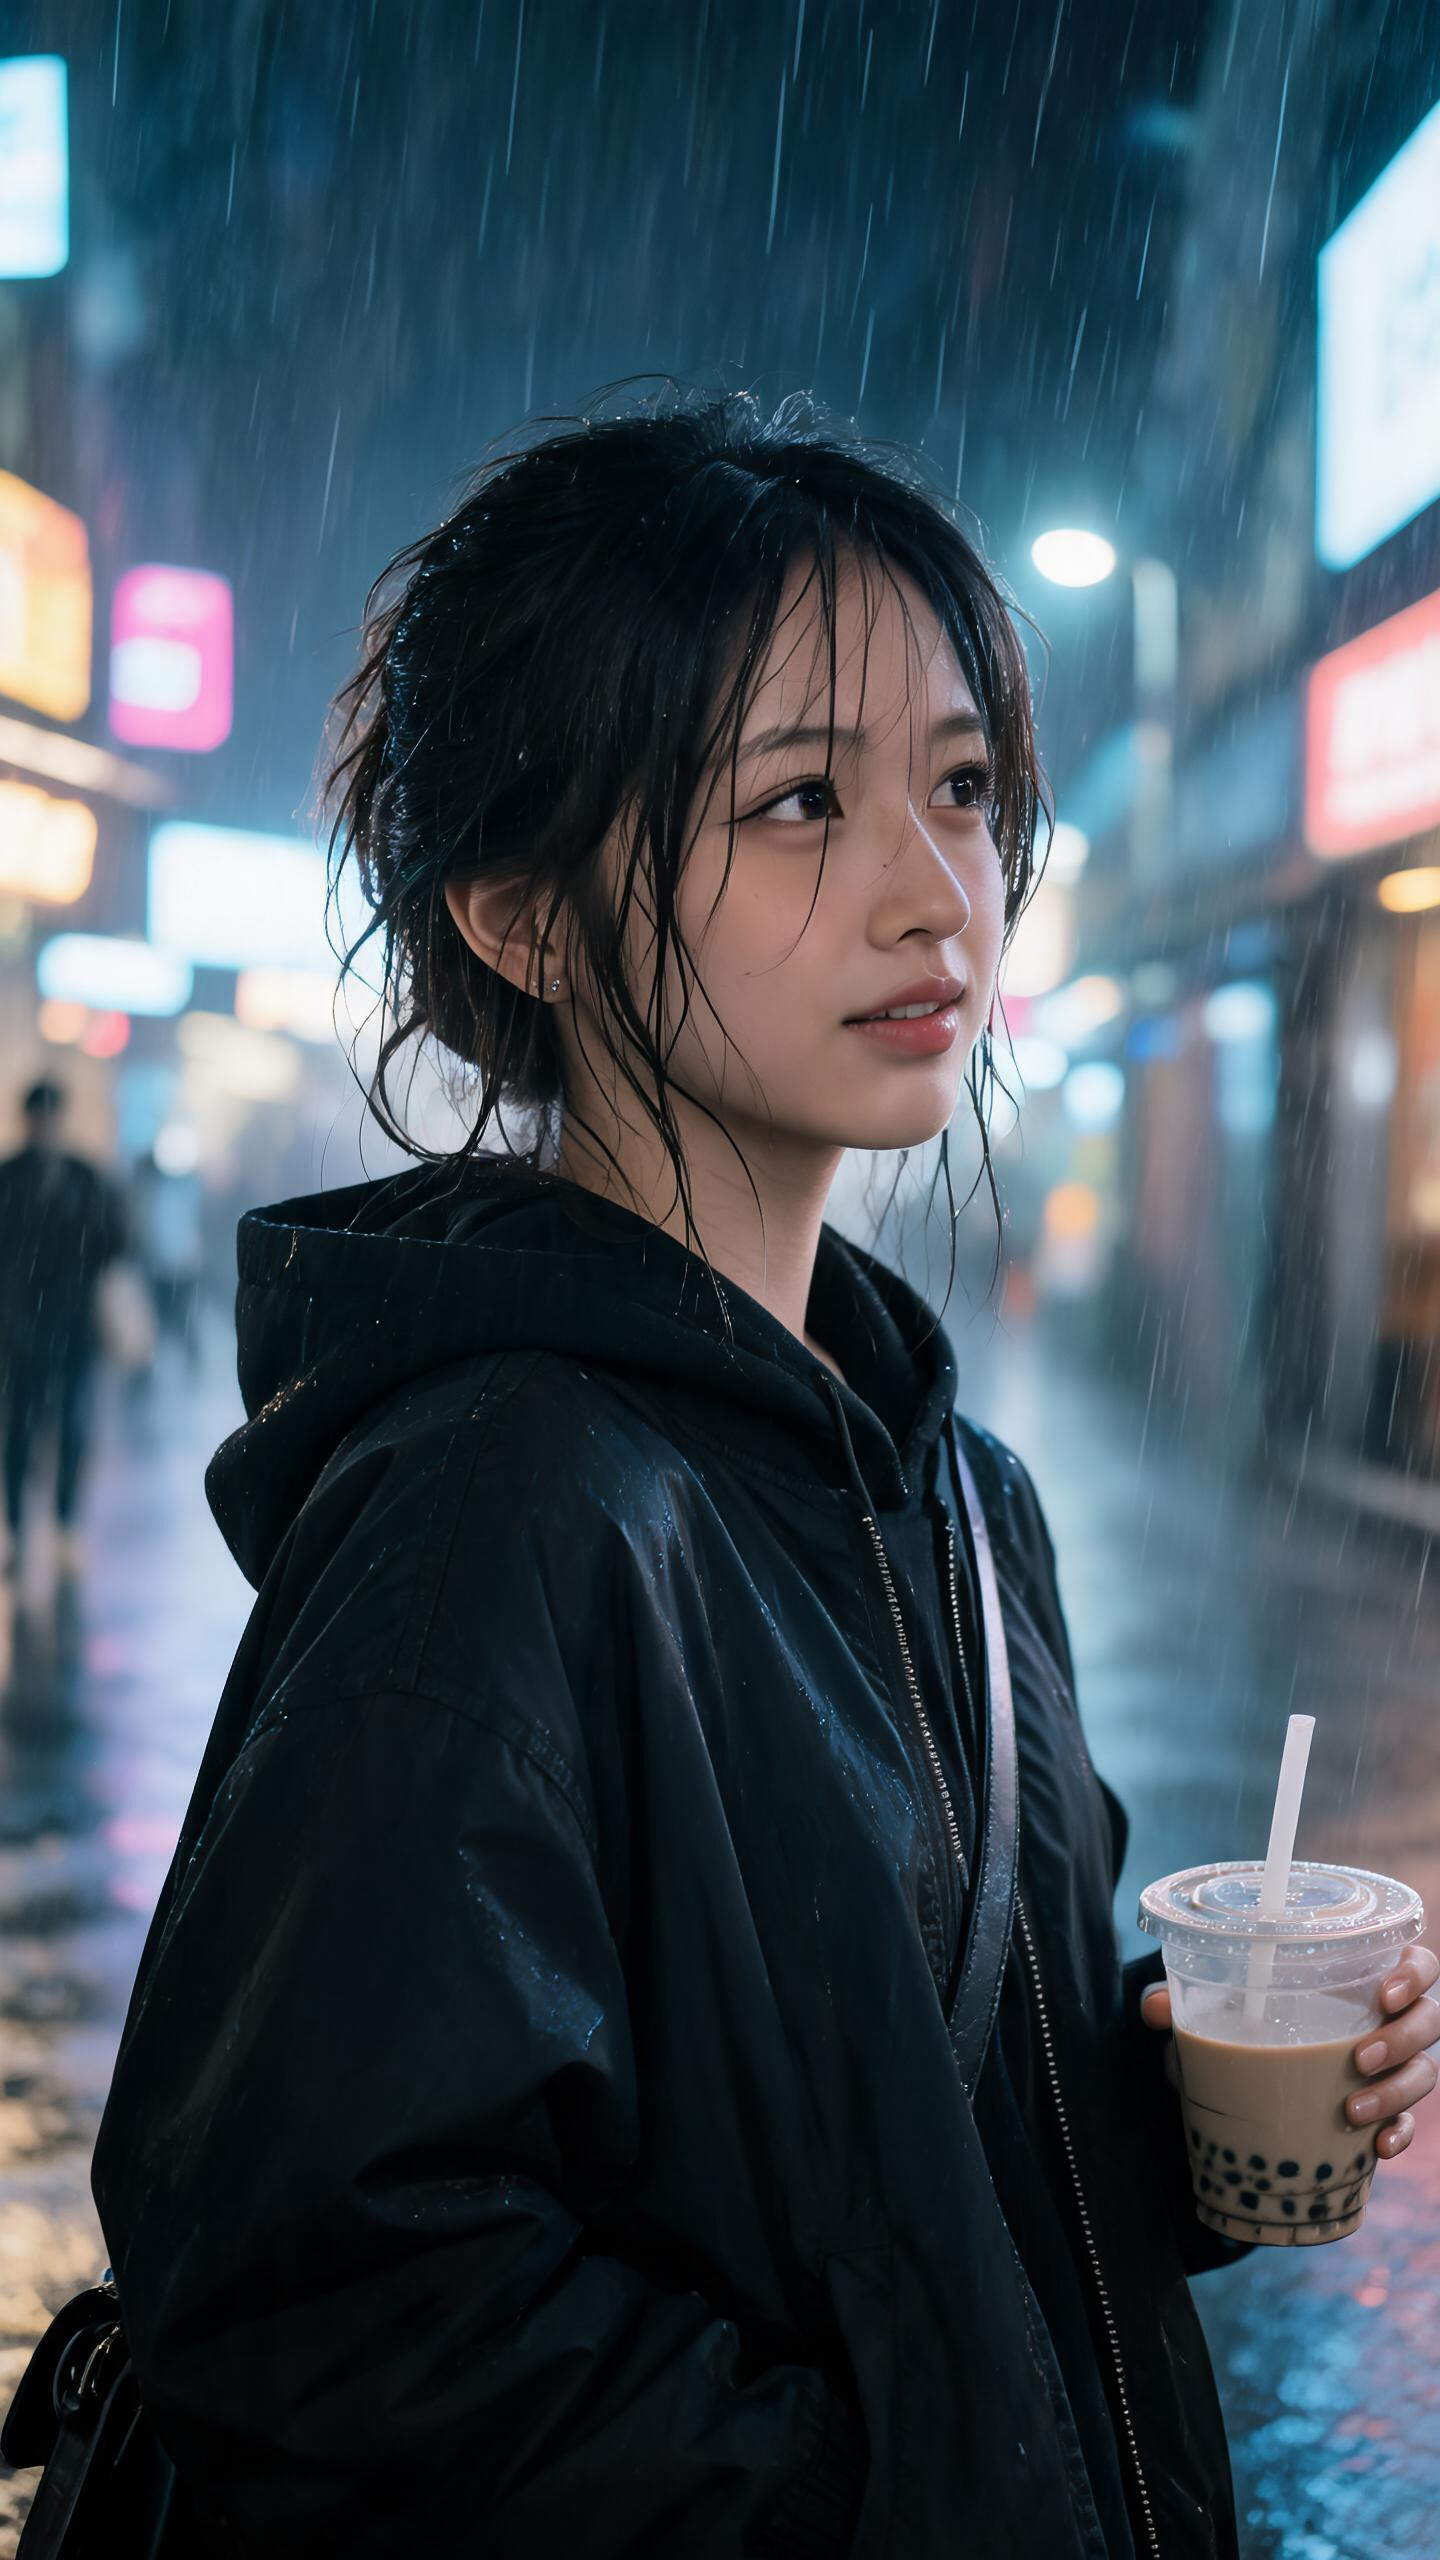
Portrait Scene and Wardrobe Restyling
Move the portrait from a rainy neon street into a warm golden-hour cafe and update the wardrobe, while keeping her identity, gaze, pose, and cup recognizable.
Editing prompt
"Replace rainy neon street with a warm golden-hour cafe, and change black jacket into a tailored beige trench coat."
Edit Photos Online with an AI Photo Editor
This prompt-based AI Photo Editor combines a reference photo with a written instruction to create a new edited version. Describe the result you want in everyday language to replace a background, restyle a portrait, update a product scene, or adjust lighting while keeping the original image as your visual reference.
Prompt-Based Photo Editing
Upload a photo and describe the edit as you would brief a designer. Name the subject, the requested change, and the details that should remain untouched.
Automatic Photo Editor Workflow
The automatic photo editor interprets the image and instruction together. Review the result beside the editor, refine the prompt, and generate another version in the same workspace.
Reference-Aware Changes
Use the uploaded image to guide identity, pose, product shape, camera angle, or composition. Add more references when you need extra guidance for style, material, layout, or supporting objects.
Flexible Image Output
Choose a square, portrait, or landscape ratio and generate at 1K, 2K, or 4K where supported. For a 1:1 image, use 1K or 2K because the current model does not combine square output with 4K.
See Real AI Photo Edits Before and After
After the portrait example in the workspace above, explore three more editing workflows: turn a clean product shot into a campaign visual, redesign a room without moving its structure, and restore a damaged historical photo.
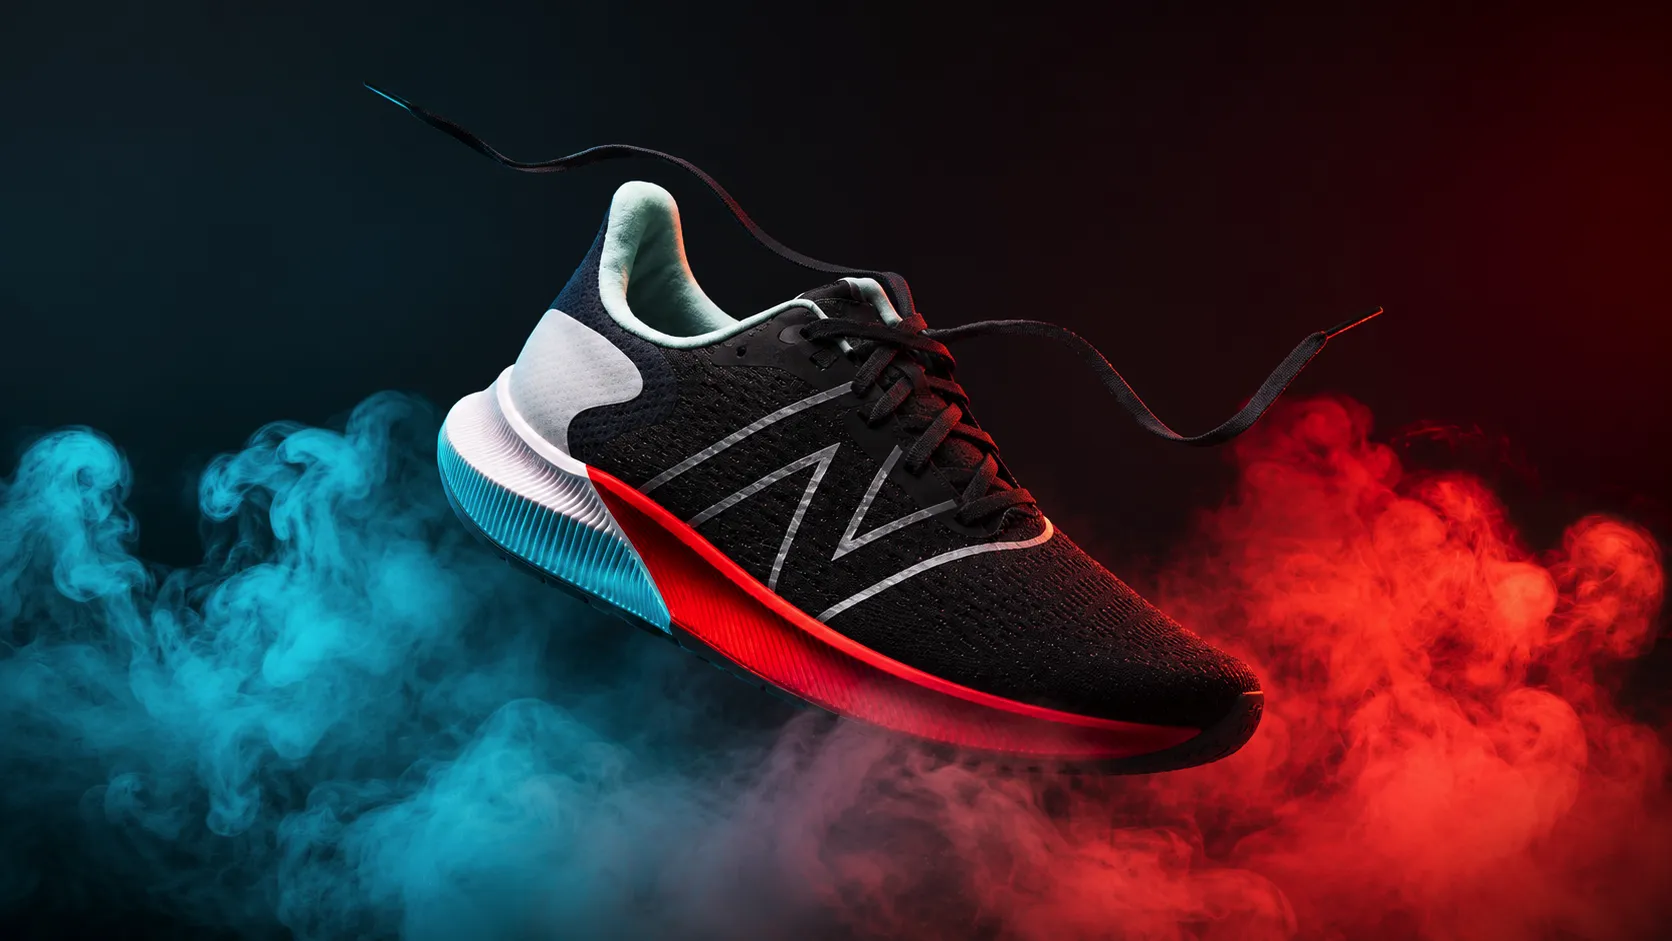
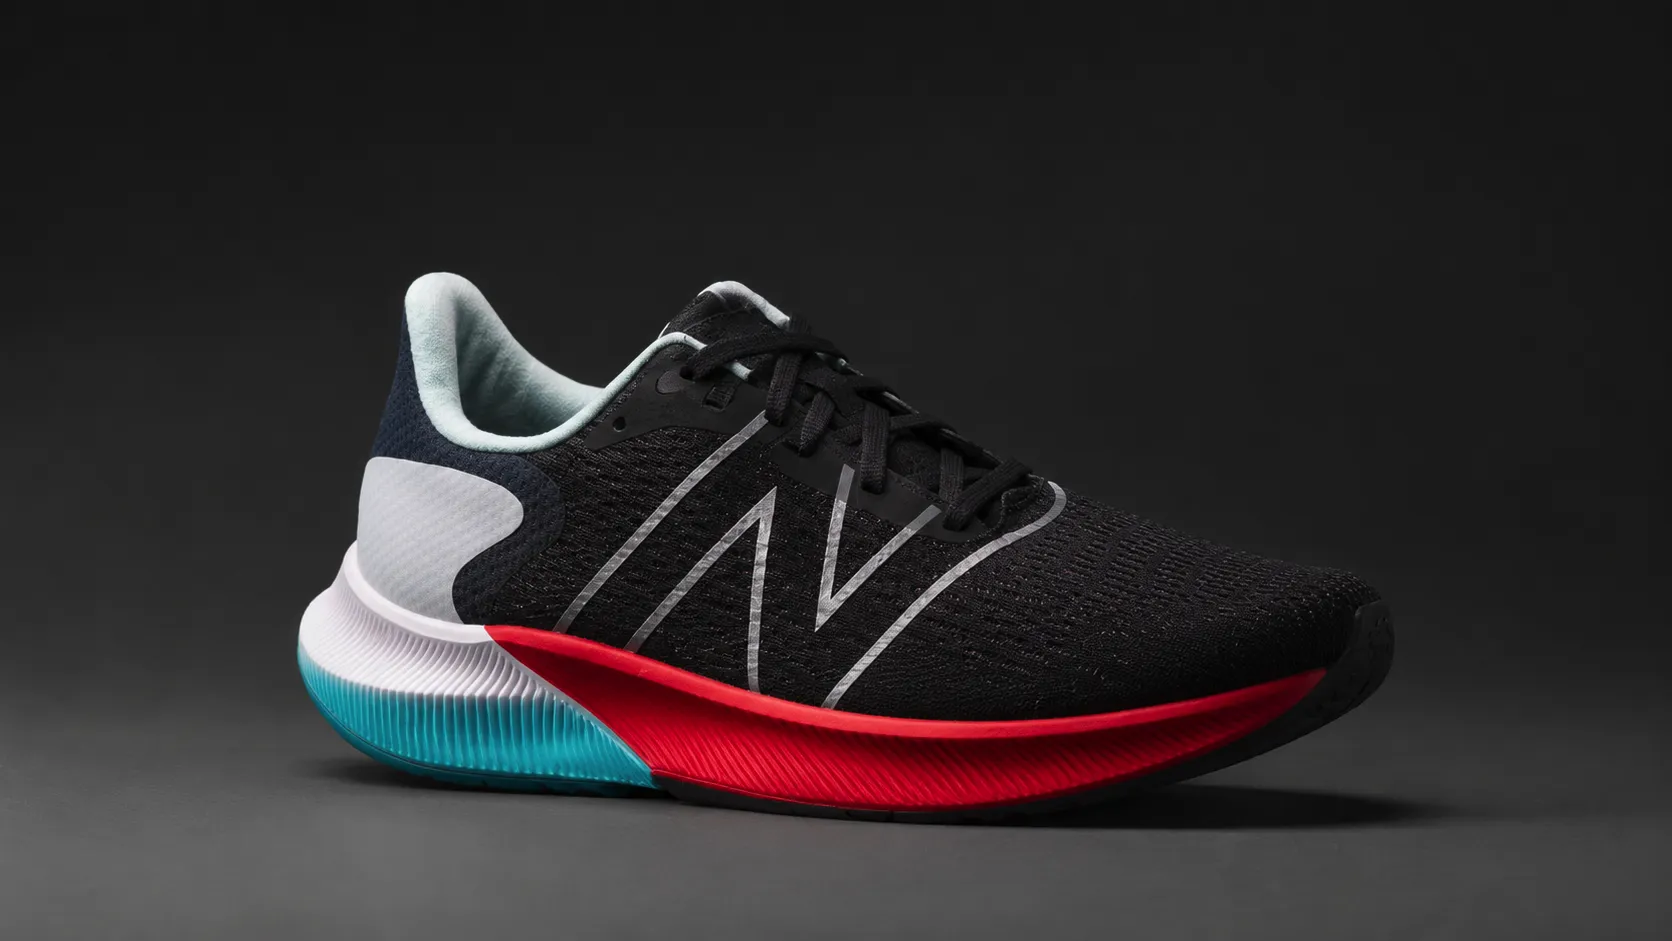
Product Campaign Restyling
Turn a clean shoe photo into a high-energy campaign visual with a floating composition and red-cyan smoke, while preserving the shoe's silhouette, materials, colors, and graphics.
Editing prompt
"Recompose shoe floating in midair with dynamic red and cyan smoke on a deep dark campaign backdrop."
Interior Style Transformation
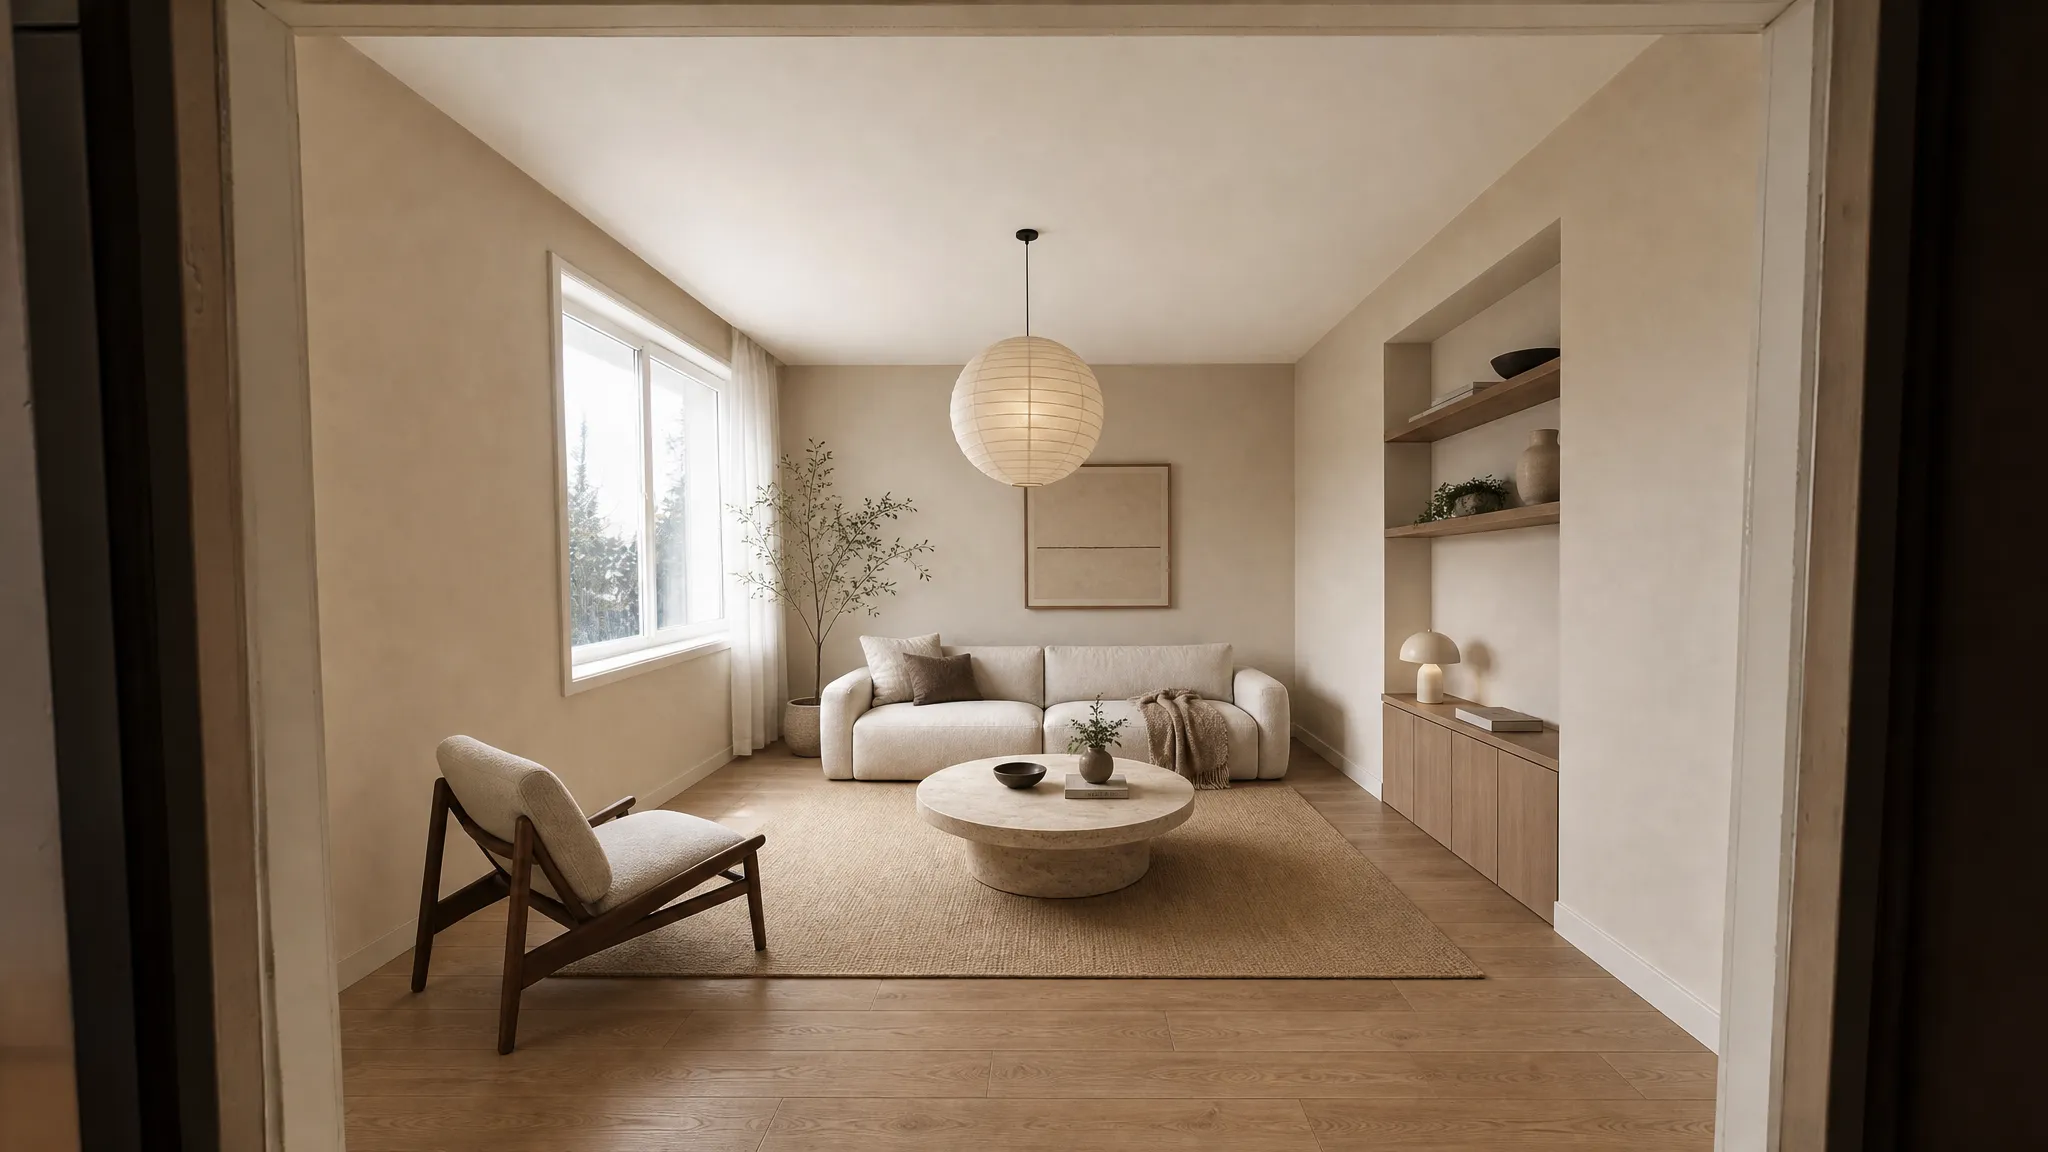
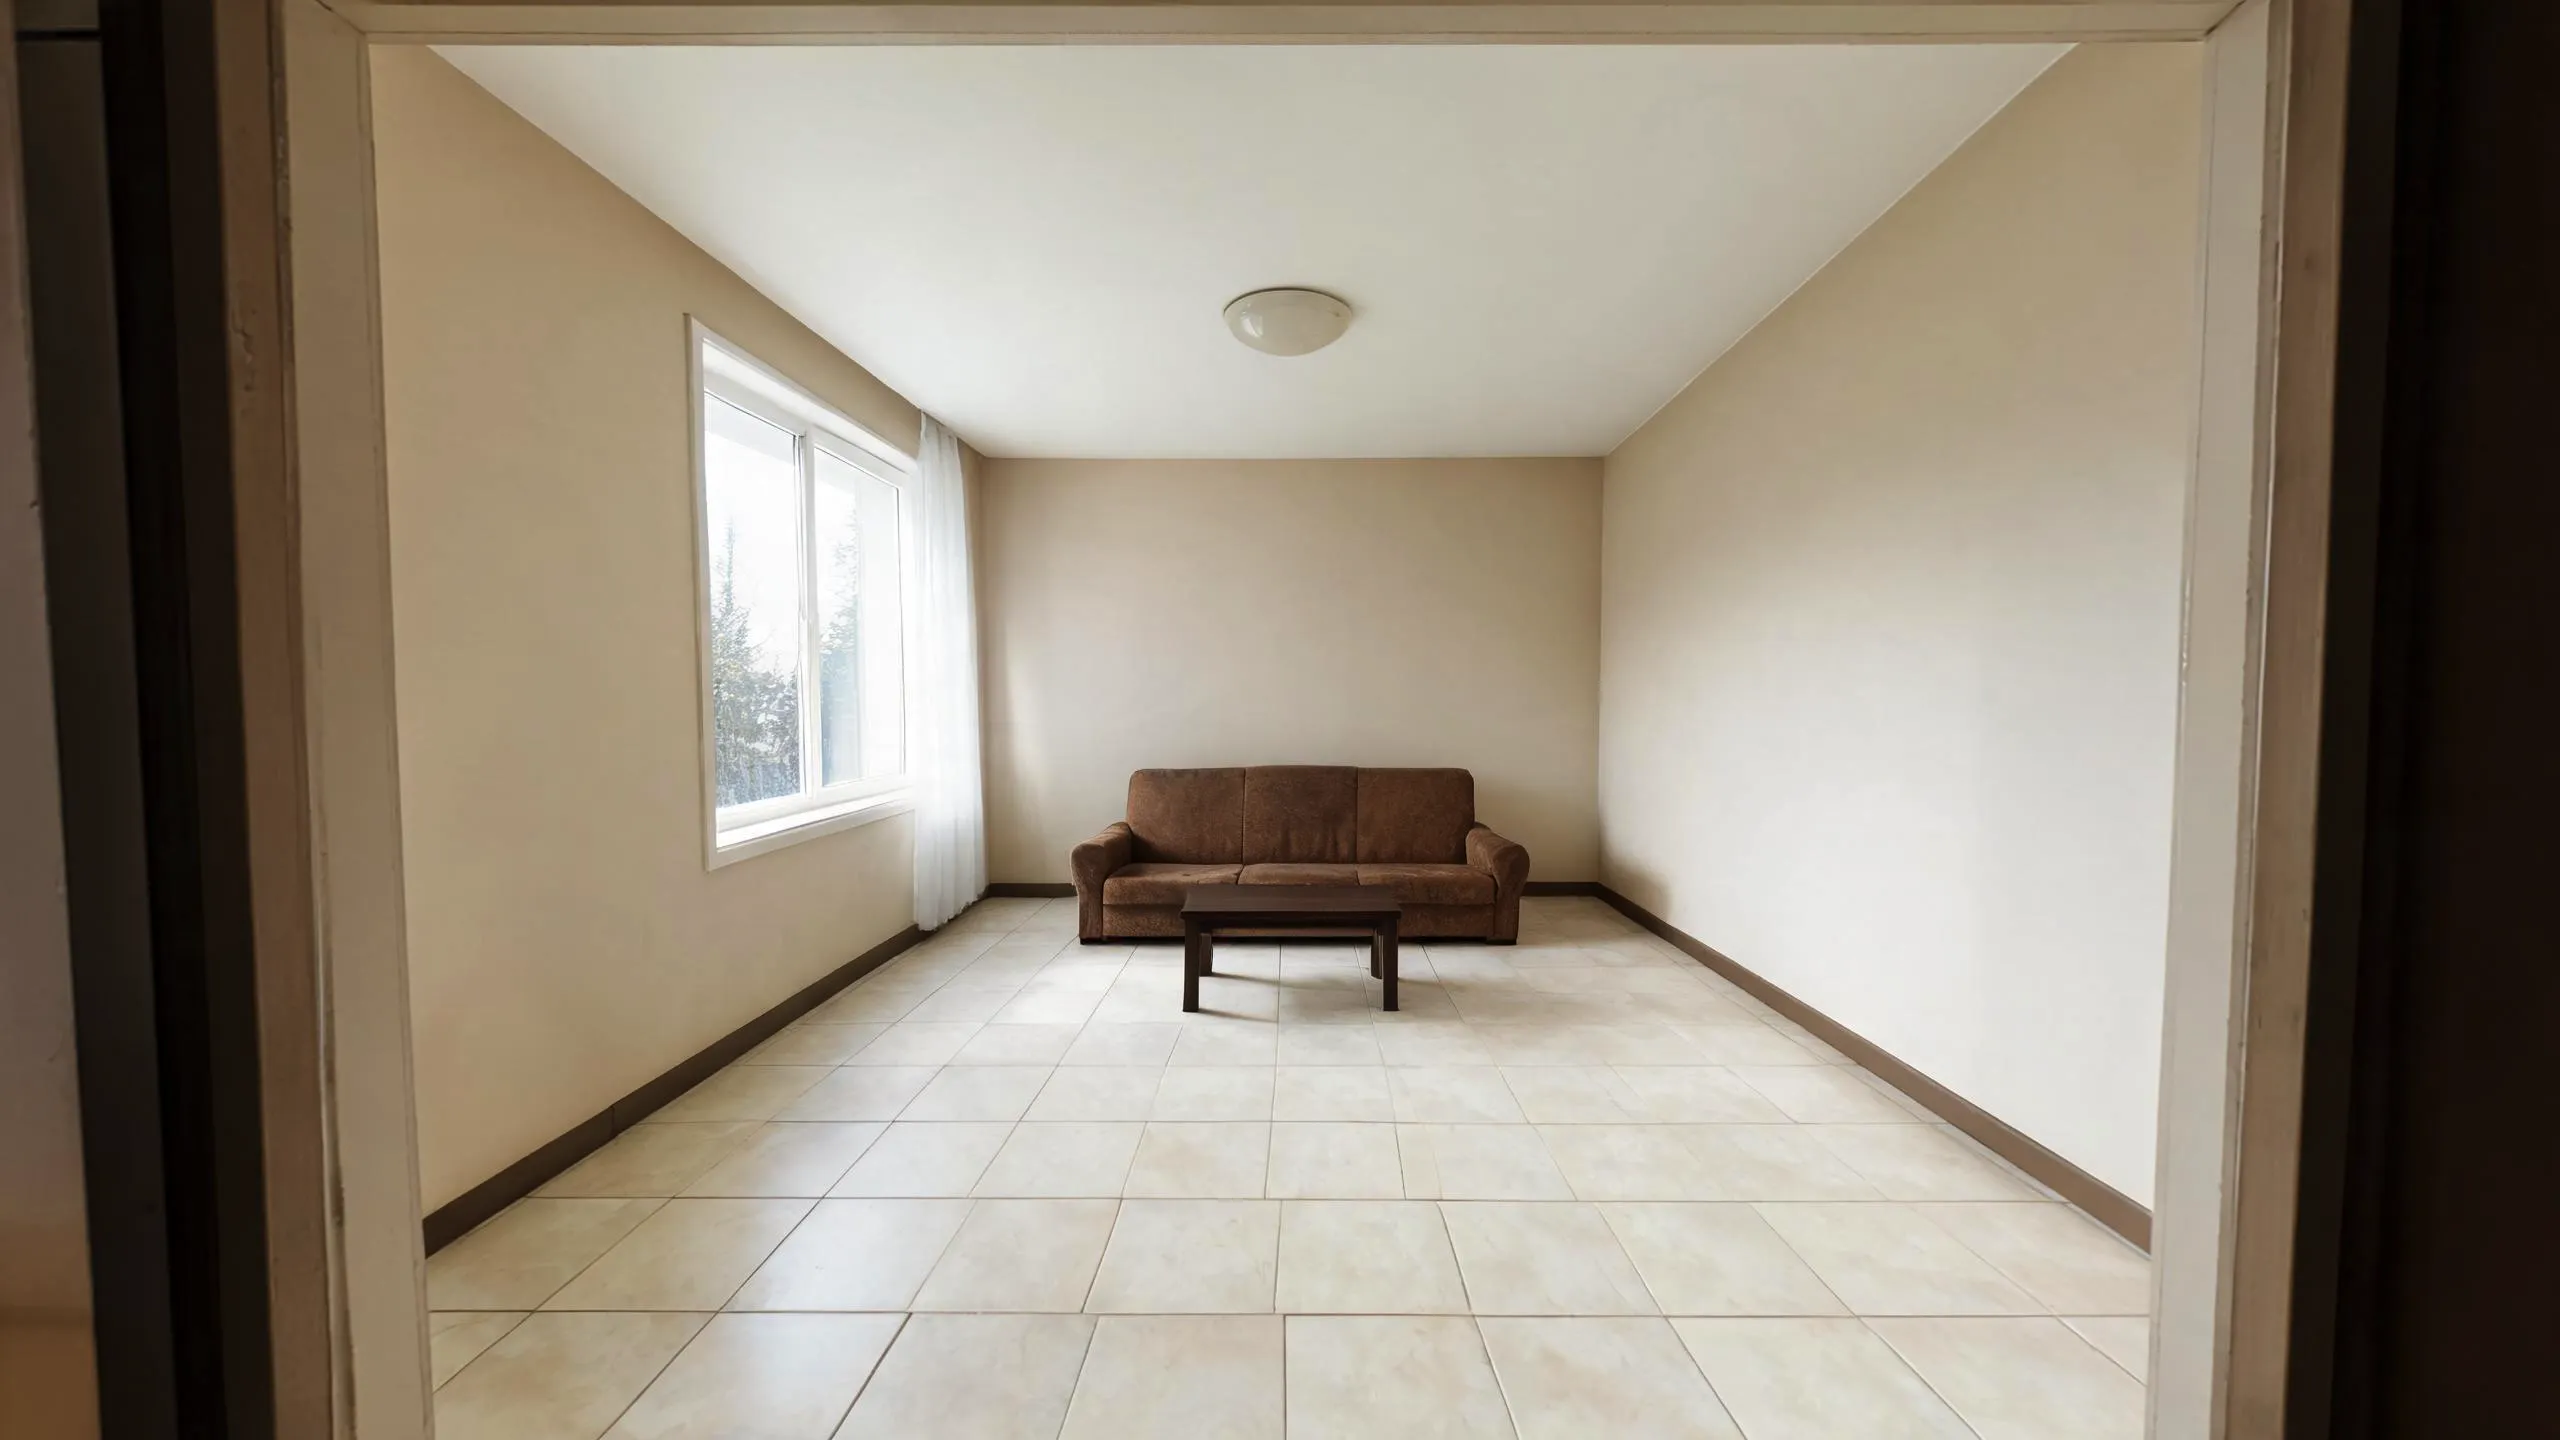
Turn a dated living room into a warm, contemporary Japandi interior while keeping the room layout, windows, and camera angle recognizable.
Editing prompt
"Redesign dated living room into a warm contemporary Japandi style with light oak floors and cream sofa."
Historical Portrait Restoration
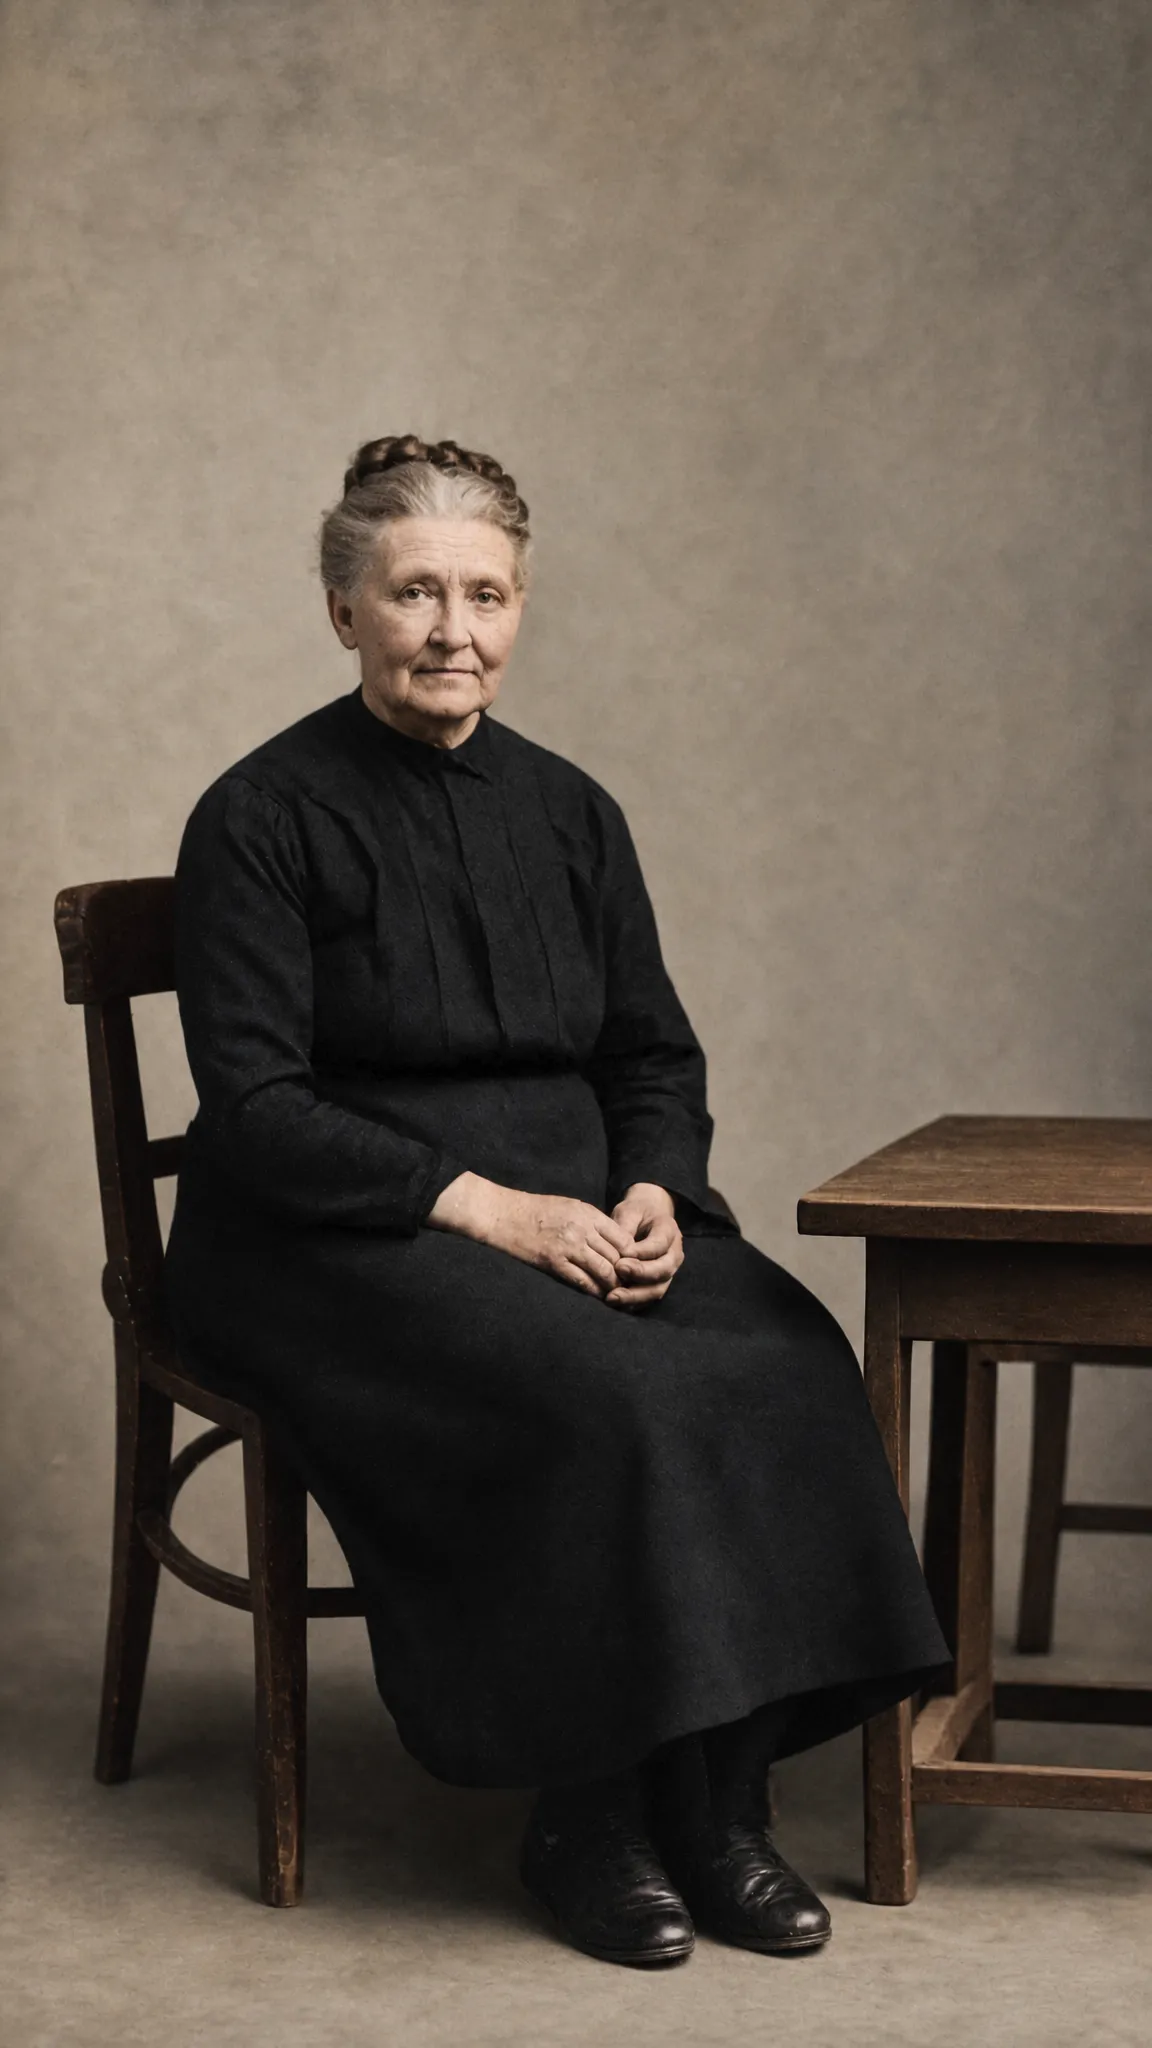
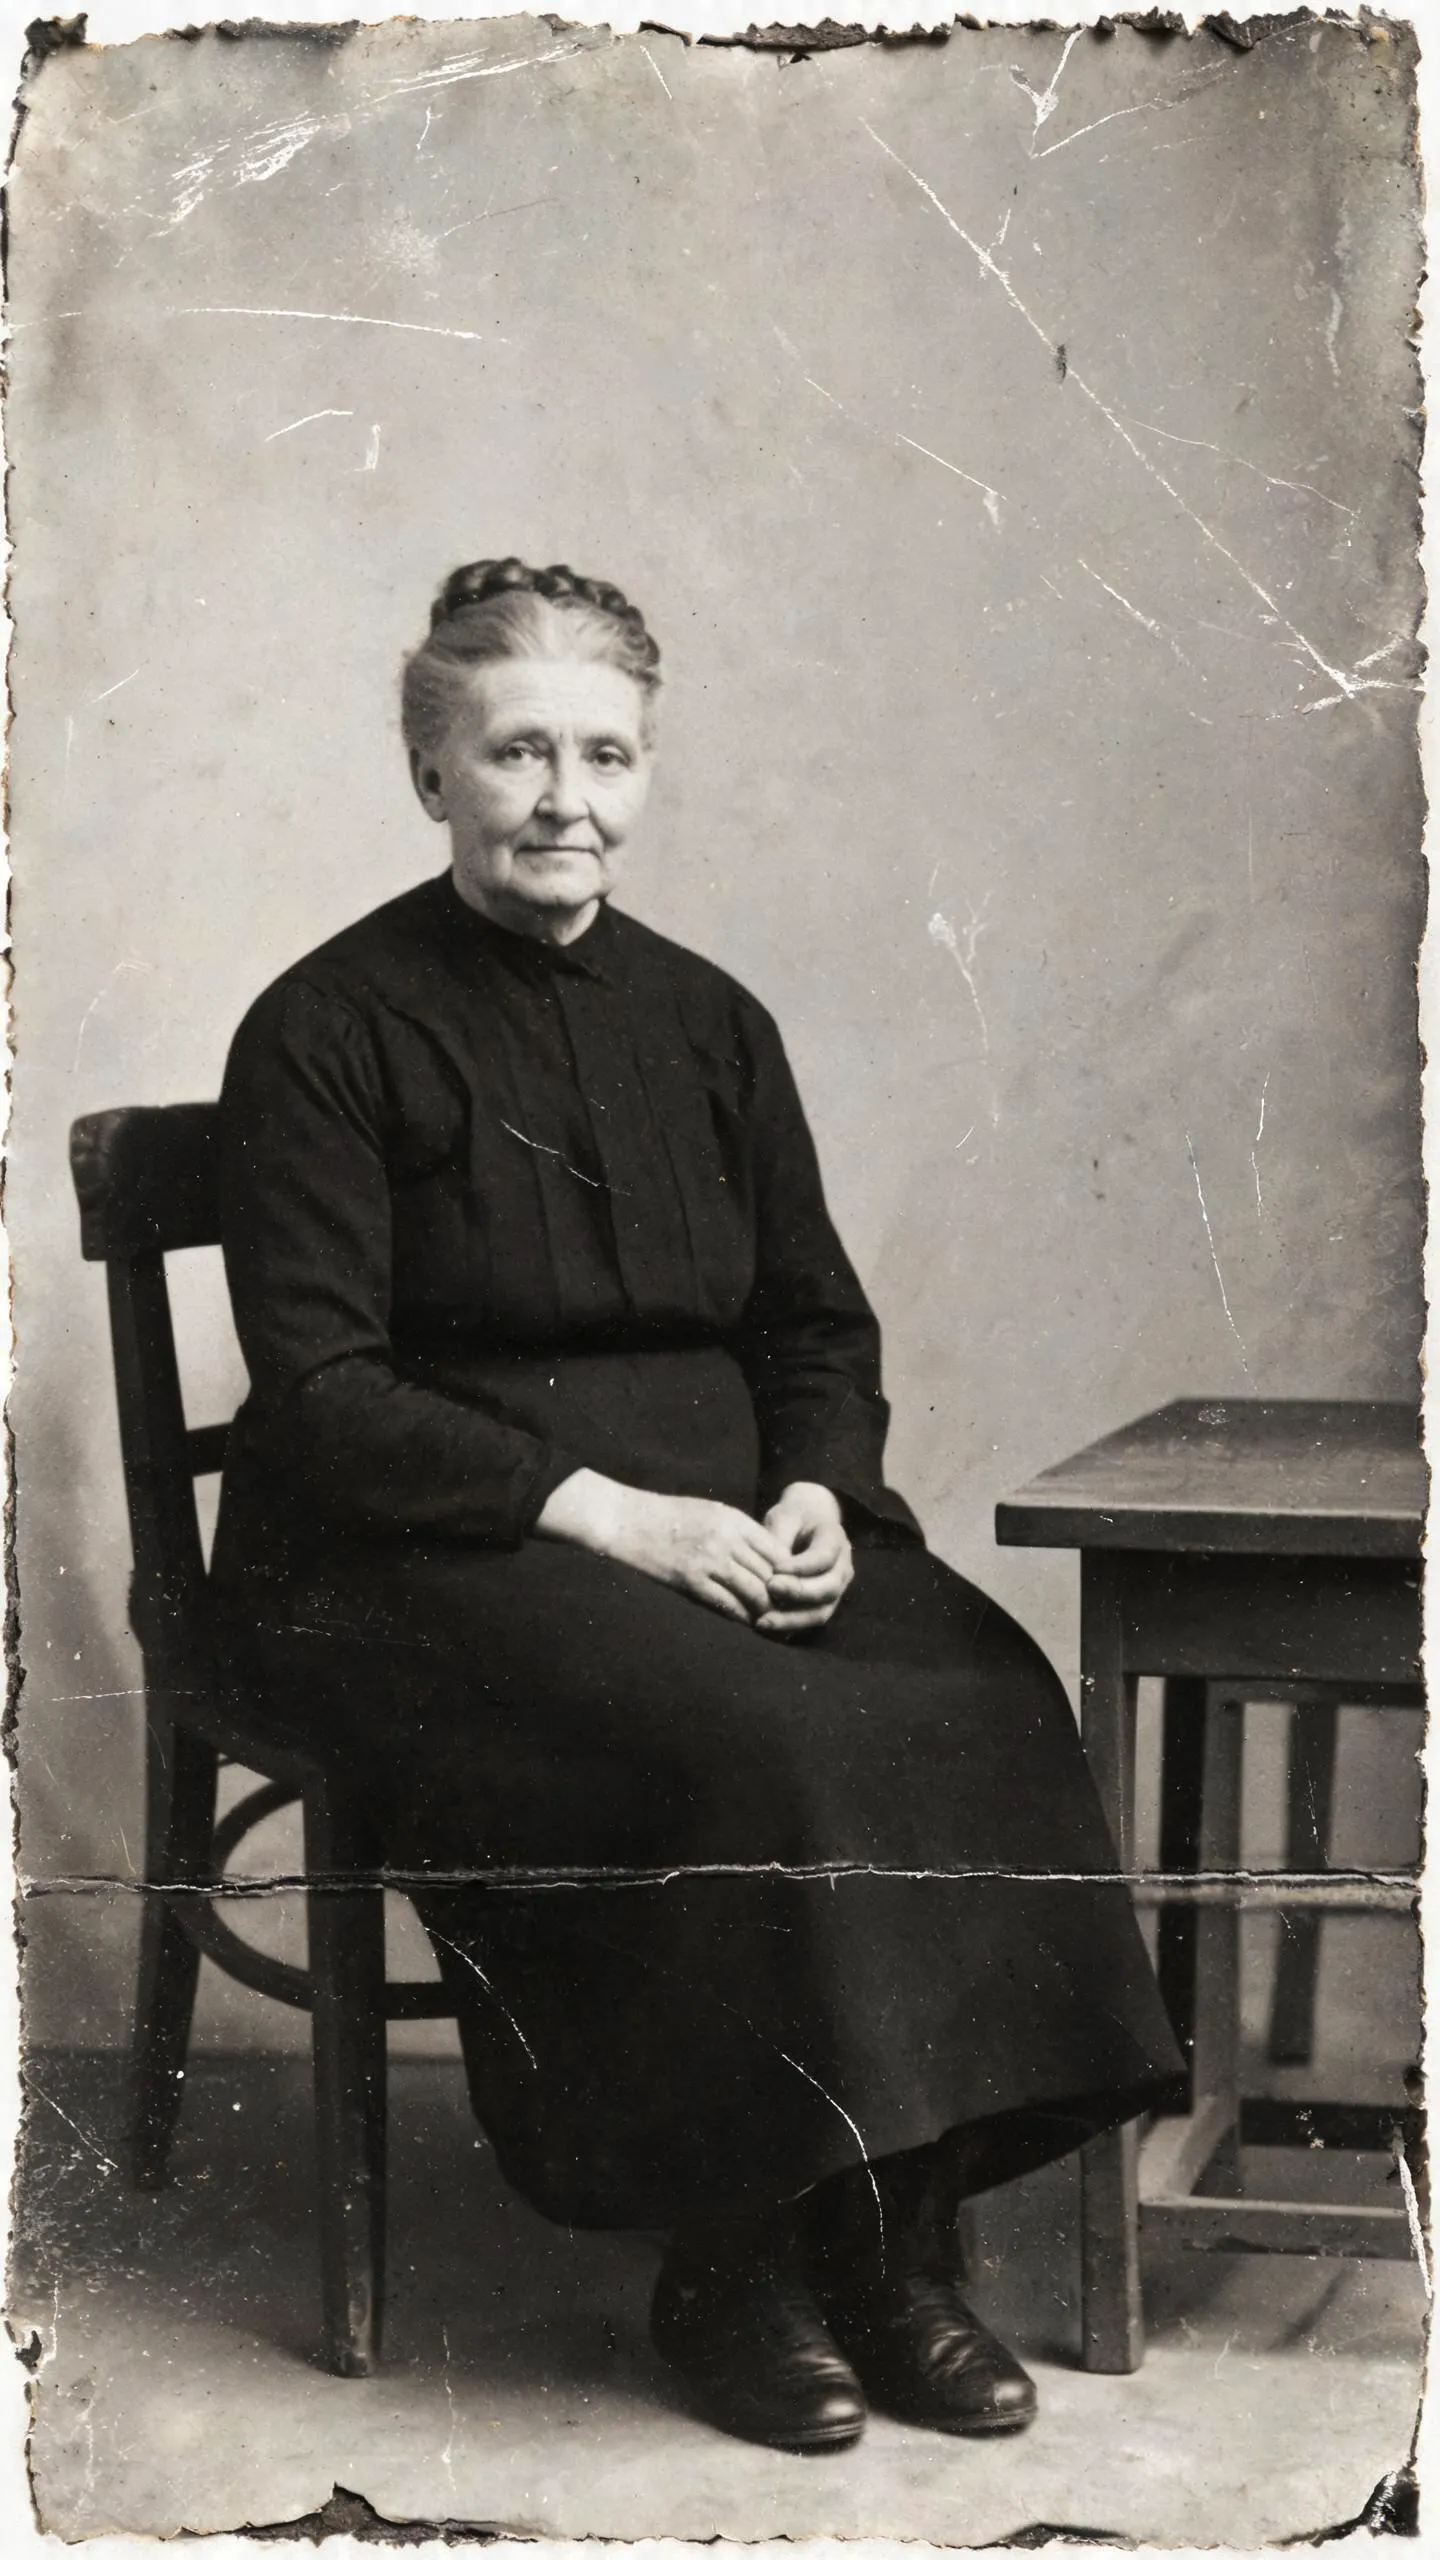
Repair scratches, dust, and torn edges, then add restrained period color while preserving the subject's identity, expression, clothing, hands, and original pose.
Editing prompt
"Repair scratches and edge tears, then colorize with natural skin tones and deep charcoal dress."
How to Edit a Photo Online in Three Steps
Complete the full edit in one workspace: provide a source, write the instruction, choose the output settings, and review the result on the right. There is no desktop software to download or draft to move between separate tools.
Step 1
Upload Your Photo or Choose an Existing Asset
Select a photo from your device, previous uploads, or generated image library. You can use up to ten reference images when the task benefits from separate subject, style, layout, or product references. Start with one clear source for a straightforward edit; add references only when each one has a specific role.
Step 2
Describe the Exact Change
Write a direct instruction that separates the change from the protected details. For example: keep the person and pose, replace the background with a bright office, change the jacket to navy, and use soft daylight. Then choose the aspect ratio and resolution for the final placement.
Step 3
Generate, Compare, and Refine
Submit the edit and review the result in My Work without leaving the page. If the result changes too much, strengthen the preservation instructions. If it changes too little, make the requested replacement more specific. Repeat with one meaningful prompt adjustment at a time so you can identify what improved the image.
How to Get More Controlled Photo Edits
The model creates a new image rather than changing pixels in a fully predictable way. A clear source, focused prompt, compatible settings, and careful review give you more control when the result needs to stay close to the original.
Use a Clear, High-Quality Source
Choose an image where the important face, product, object, or text is visible and not heavily blurred or blocked. If several subjects appear, name the one to edit by position, clothing, or another visible characteristic so the instruction is less ambiguous.
Change One Visual Goal at a Time
Combine related adjustments, such as background and lighting, but avoid asking for several unrelated transformations in one pass. A focused edit is easier to evaluate and refine. Save broader restyling for a separate variation when you want to compare directions.
State What Must Stay the Same
Preservation instructions are especially important for identity, product design, logos, packaging, camera angle, and composition. The result can still vary because it is generated by AI, so verify every essential detail rather than assuming it was copied exactly.
Match Ratio and Resolution to the Use
Choose portrait for vertical social creative, landscape for banners or wide scenes, and square for flexible feeds. Select resolution based on the intended review or delivery. If you need a square result, use 1K or 2K because the current model configuration does not offer 4K at 1:1.
Frequently Asked Questions About the AI Photo Editor
These answers explain the editor's real workflow, free entry point, sign-in requirement, supported reference behavior, and the practical limits of automatic image editing.
Continue Your Image and Video Workflow
Use the focused editor when an existing photo should guide the result. Start from a new idea in AI Image Maker, or turn a still image into motion in AI Video Maker.
Edit Your First Photo Online with AI
Upload a clear reference, describe one meaningful change, and tell the AI Photo Editor what must remain consistent. Choose the final ratio and resolution, generate the edit, and compare the result in the same workspace.
Open the AI Photo Editor